In this article I am going to show you how to integrate Cisco ISE with Okta identity store over LDAPS protocol. For this integration I’m going to use:
- Cisco ISE 3.2
- Okta Web Console
Also you need admin access in the Okta and Cisco ISE. Let’s begin.
Okta Configuration Steps
t is a most secure way to integrate Cisco ISE to LDAP server with “Authenticated Access”. To do so we need a user within Okta who doesn’t need to be a privileged user. To creating a user inside of the Okta follow the below direction:
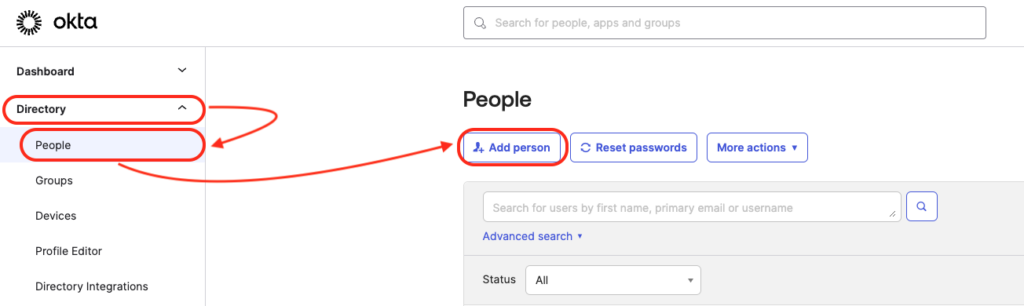
Directory -> People -> and click on Add Person button.
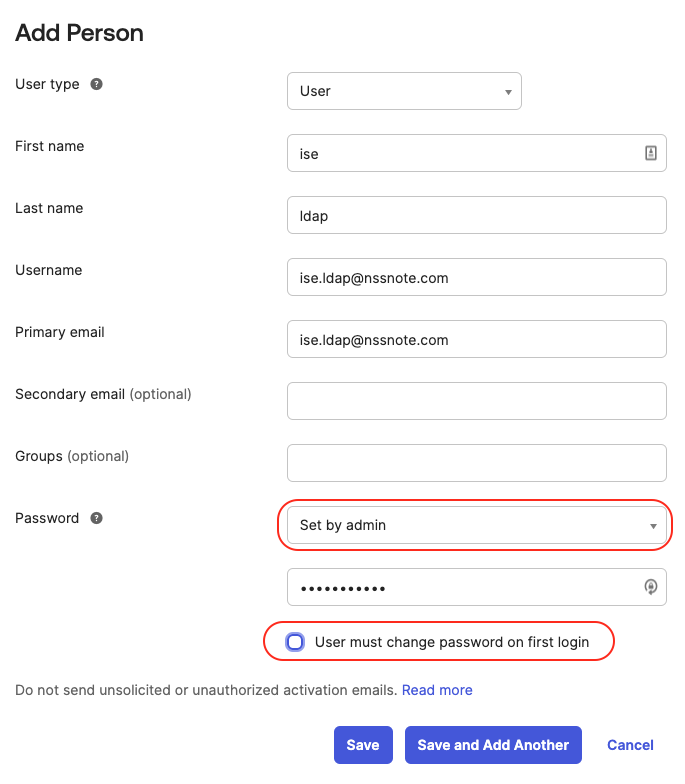
Fill out the information, and make sure you set the password to set by admin and uncheck the “user must change the password on the first login” and hit the Save button. Make suer you have the user’s distinguished name. In my case, it is “[email protected],ou=users, dc=nssnote, dc=oktapreview, dc=com”
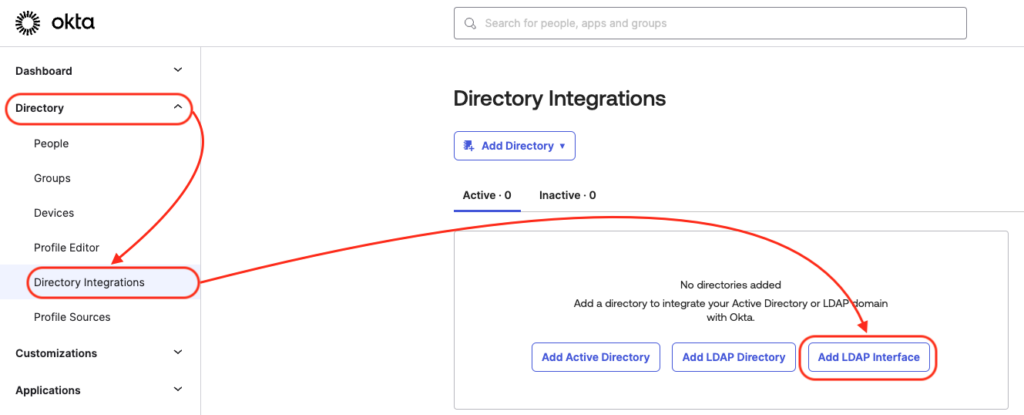
Now, we need to enable Okta LDAP interface. To do so, follow the below direction:
Directory -> Directory Integration -> and select Add LDAP Interface.
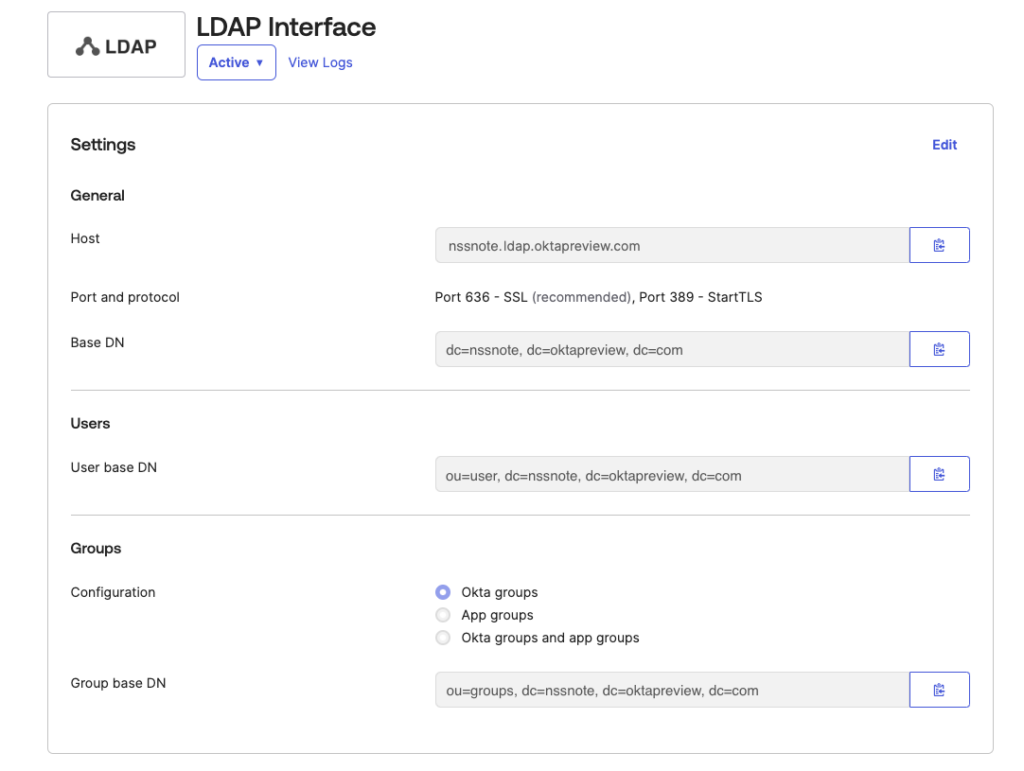
Then Okta is going to create an LDAP interface and you can see the information such as Host, Base DN, and User Base DN. we are going to use these values later for Cisco ISE configuration.
ISE Configuration Steps
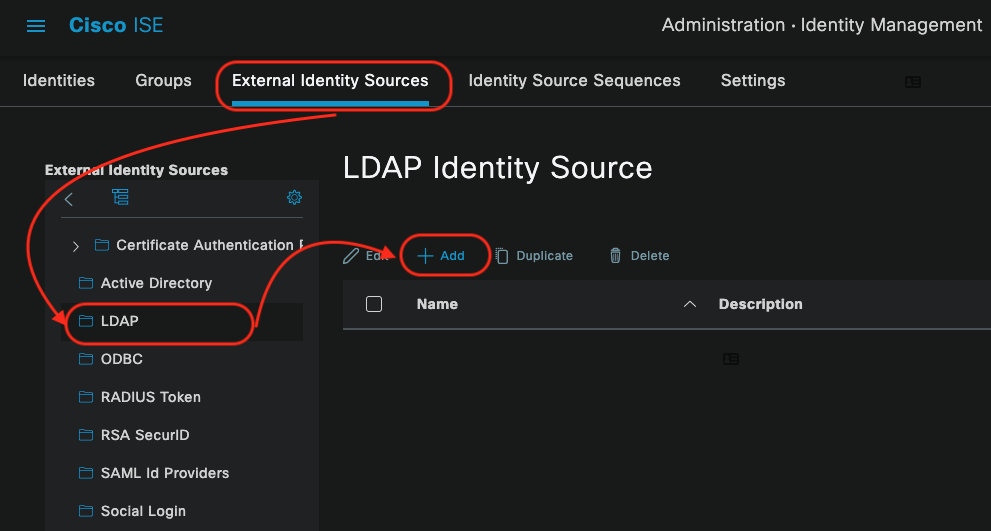
It is possible to add an LDAP server into the Cisco ISE as an External Identity Source. Thus, let’s follow the below direction:
Administration -> Identity Management -> External Identity Source -> LDAP and click Add button.
In the General tab make sure the LDAP Schema values are:
Subject Objectclass: InetOrgPerson
Subject Name Attribute: uid
Group Name Attribute: CN
Group Objectclass: groupofUniqueNames
Group Map Attribute: uniqueMember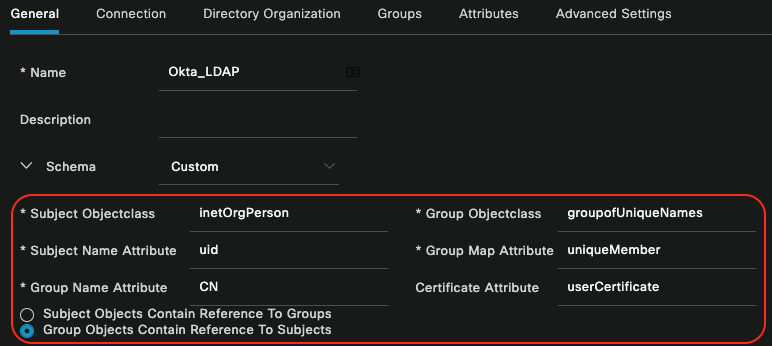
Now move to the Connection tab and fill up the mandatory parameters according to:
Hostname: You already got the Hostname when you enabled the LDAP interface in the Okta. In my case it is *****.ldap.oktapreview.com
Port: 636
Admin Access: Authenticated Access
Admin DN: in my case is [email protected],ou=users, dc=nssnote, dc=oktapreview, dc=com. However, it is the account’s DN you have already created within the Okta.
Admin Password: *******
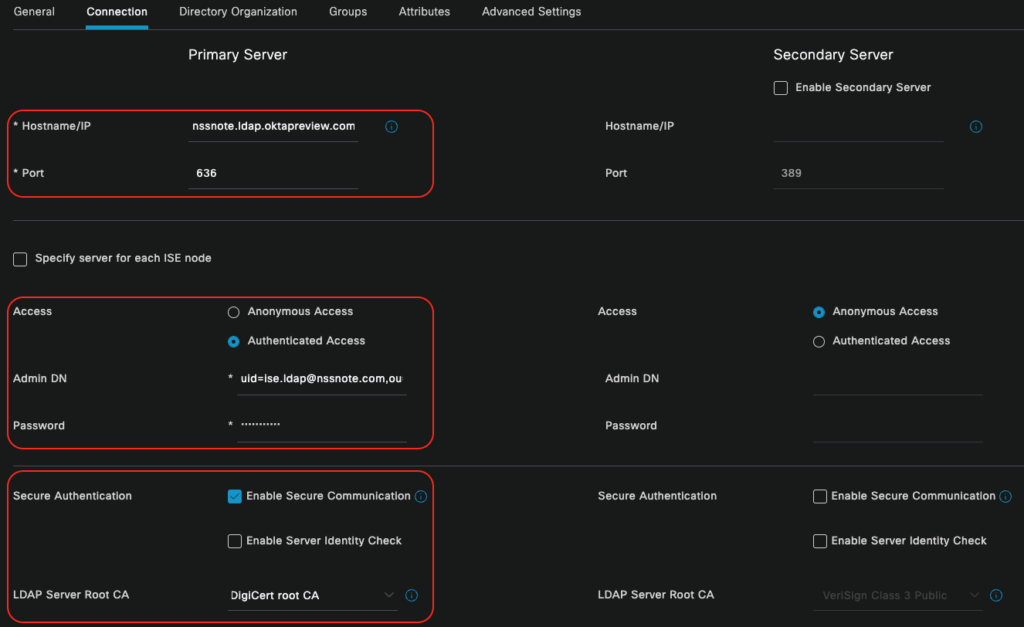
Make sure you checked the “Enable Secure Communication”. In addition, “DigiCert Root CA” must be selected as the LDAP server root ca.
Click on the “Submit” button.
To test connection you can click on “Test Bind to Server” button.